FFwD: Coconut Friands
This week the French Friday group made small tea cakes: Coconut Friands.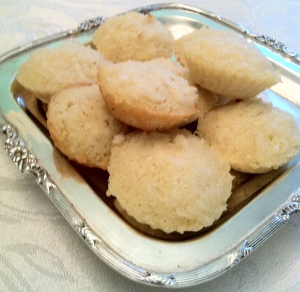 These were simple to put together requiring only a few ingredients that you most likely have in the pantry unless you belong to the anti-coconut group. I must admit that until I read some of the comments about this recipe I don’t believe I have ever known anyone who didn’t like coconut. Dorie prefers these made with unsweetened shredded coconut. I could not locate unsweetened so I used the sweetened I already had.
I baked these in fluted mini muffin tins. I checked and mine held 2 1/2 tablespoons of water just as Dorie’s does. Maybe I overfilled mine as I only got 15 friands from this recipe even though Dorie says she gets 24. I had meant to put candied cheeries into these and I’m sorry I forgot to do it as I think they could have used a little color. Some of the friands developed a golden color on the bottom but the others did not and I think the flavor of the golden ones was just a little better. I was tempted to put them back in the oven but because I needed the oven for something else I didn’t.
This post is part of French Fridays a group that is cooking their way through the recipes in Around My French Table. You can see how the others fared here.
FFwD:Salmon and Grapefruit Salad
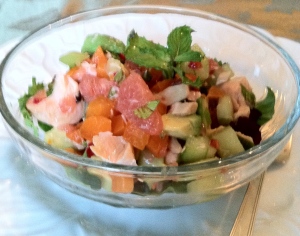
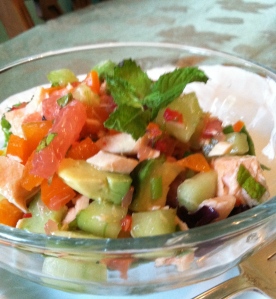 Our recipe for the week was the Crab and Grapefruit Salad on page 134. This assignment created something of a dilemma as we don’t eat shellfish at home. I knew there was an option to use imitation crabmeat. I discovered that all the regular imitation crab is flavored with real crab shells so I tried to find kosher imitation crab but there was none to be found here. I had a piece of poached salmon in the refrigerator so I decided to try the recipe substituting the salmon for the crab. It was an inspired choice. I had a ripe avocado so I made guacamole with half and small pieces with the rest. I served it as the first course at dinner. My husband and daughter who is usually a picky eater loved this. Surprisingly I too found it agreeable.
You can see how the other participants of French Fridays with Dorie fared here as we cook our way through all the recipes in Around My French Table by Dorie Greenspan.
FFwD: Cocoa Sablés
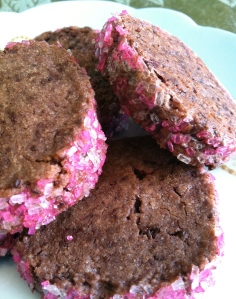 Cocoa Sablés appeared to be an easy recipe. After reading the recipe this week I had a vision of lovely, crisp chocolate cookies with a crystal sugar rim. Dorie cautions us not to over mix; maybe that’s what was wrong with mine. When I got to the point when I was instructed to cut the dough in half and form two logs I realized that my dough was way, way too dry and crumbly. I read and reread the dough to see if I’d forgotten to add some source of moisture. I have occasionally gone through a new recipe so quickly I’ve left out a step. Nope. I’d put in everything. Rechecked that I’d put in the correct amount of flour, cocoa, and butter. Yes. Okay, I scooped out about a third on some plastic wrap and squeezed until I had almost formed a log. I wrapped in the plastic wrap and continued squeezing until it seemed to be holding together. I made three logs this way. With less than full confidence these went into the refrigerator.
The next morning after darling daughter and sweet husband had gone off to their busy day I turned on the oven and took one cookie log out of the refrigerator. I painted the log with the egg wash and rolled it in the sparkling sugar. Hmmm. Sugar didn’t stick very well. Okay. Picked up the log with the sugar laden paper and sort of pressed it in. It didn’t look much better but there was more sugar adhering. Then I began cutting into disks. Quite a few split in two. I was able to push the pieces back together but I wasn’t sure if they would stay together. As I put them into the oven I was sure all I was going to have to show you was a pile of crumbs. After about 18 minutes out they came. Most of them stayed together and they looked okay, not great but okay.
I decided the sugar might adhere better and the logs would cut easier if I left them out of the refrigerator for a little while. That did help a little; none in the second log broke apart. With the third log the sugar adhered better but several of the disks broke apart.
I did like them but they aren’t the best cookies I’ve ever eaten. Give me an oatmeal raisin cookie any day. These aren’t exactly what I envisioned but they are quite lovely and I would make them again but not often. 
I made these Cocoa Sablés as part of French Fridays as we cook our way through Around My French Table. Go here to see how all the others did with their sablés.
TWD-BWJ: Irish Soda Bread
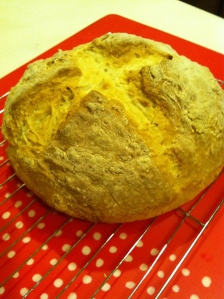
Our assignment for this Tuesdays with Dorie is Irish Soda Bread. It’s very interesting how four very simple ingredients: flour, soda, salt, and buttermilk can be transformed into a crusty, comforting loaf of bread. There are hundreds of recipes and variations available for Irish soda bread. There are a myriad of articles that have been written about what is authentic and what is not. I’m sure over the years every family in every home and county made this recipe their own just as you can probably look through each of the hundreds of postings on Tuesdays with Dorie and see a great many different ways to make soda bread and different ingredients to add to the dough depending on what is in the pantry where you live.
I have made Irish Soda Bread before; not too successfully I might add. I began my preparation as I have so frequently lately by viewing the episode of Baking With Julia with Marion Cunningham where she prepares soda bread. I believe it is available on YouTube as well. If you watch it notice her beautiful hands as they stroke and caress the dough. I love how she wears her rings even when putting her hands in the sticky dough. (I’ve been criticized for not taking mine off so I’m going to remember that she doesn’t either.) I always feel so much more confident after watching these shows which I suspect was a key to their popularity. You just feel like you can do anything. 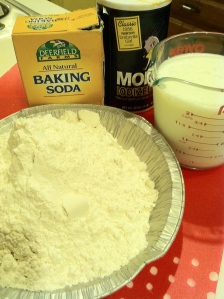
Basically you mix the dry ingredients together and then pour the buttermilk into a well in the center of the dry ingredients and mix together quickly. With floured hands quickly form into a ball, patting and kneading as little as possible. Lay the dough into a greased pie plate. You cut an X into the top of the loaf and bake it in the oven for about 50 minutes. You want to do this all quickly because it is the reaction between the acid in the buttermilk and the soda that gives the bread its rise. You don’t want to over handle the dough letting all those gas bubbles escape.
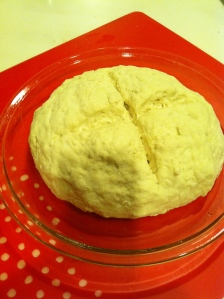
This recipe produced a wonderful loaf that was enjoyed over several days. Dorie cautions that the loaf can become hard and inedible after a day but following Julia’s instruction on the DVD to wrap tightly in plastic it lasted more than four days. I do believe I could have allowed the loaf to remain in the oven a little longer. It was great when we first cut it but just a little damp the next day. It made fantastic toast.
This post is part of Tuesdays With Dorie a dedicated group of cooks who are baking their way through the recipes in Dorie Greenspan’s Baking With Julia which was the companion book to the television series Baking with Julia. You can go here to see how all the others in the group did with their Irish Soda Bread and all their creative adaptations. Our hosts for this week are Cathleen at My Culinary Mission and Carla at Chocolate Moosey.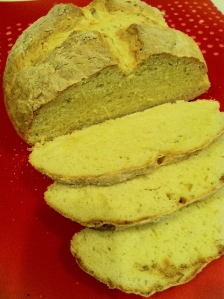
FFwD: Cheese Souffle
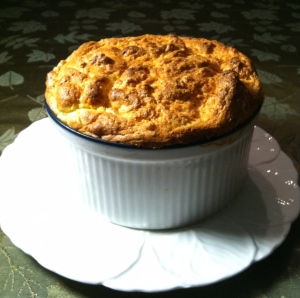 Our challenge this week: Cheese Souffle. I’ve eaten many dessert souffles but never a cheese souffle. I’ve heard so many times that the timing is so crucial that I’ve never considered trying to prepare one myself. According to Dorie the souffle has an undeserved “reputation for fussiness” that keeps many cooks from attempting them. With that encouragement and in the interest of keeping my commitment to the French Friday group I accepted the challenge to try it, even if just this once.
Since I’ve been enjoying my Julia Child DVDs so much I decided to Google “cheese souffle” to see if there were any videos. Sure enough someone had posted the episode of Julia making a cheese souffle here. Not only did she make a souffle she provide several tips for partially making and holding a souffle until you are ready to bake to help control the time issue. I felt so much more confident after watching Julia make one. I’ve always been more of an aural-visual learner.
Making the bechamel or thick white sauce was easy; I’ve done that before. I did follow Dorie’s recipe to melt the cheese into the bechamel, although Julia put hers in after folding in the egg whites. I used a combination of Gruyere and Swiss as that’s what I had on hand. And, I dusted the buttered souffle dish with Parmesan cheese as Julia suggested. Since I wasn’t certain when my husband would be home for dinner I did follow Julia’s tip to float a little melted butter on top of the bechamel to hold it for later.
Later, I did use a foil collar around the souffle dish as it was only a six cup dish and I didn’t want the souffle to spill over. I baked it for 50 minutes which may have been slightly too long or it could have been my oven. The souffle puffed up beautifully and only deflated slightly as we took a few quick pictures.
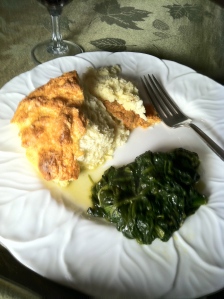
The flavor was wonderful and reminiscent of gougeres. Of course that makes sense since they share the same ingredients. The texture was slightly drier than some souffles I’ve had which made me think I might have over baked it. It was still delicious and we both greatly enjoyed dinner. I think I would like to try it next time with cheddar cheese; not very French I know.
 This post is part of French Fridays with Dorie a dedicated group who cook and blog their way through the recipes in Dorie Greenspan’s Around My French Table. Be sure to check out all the wonderful posts here to see how all the other fared this week with their souffles.
FFwD: Saint Germain des pres Onion Biscuits
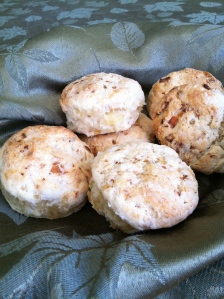 Our project this Friday: biscuits. Well, we know biscuits. These have an added ingredient: onion. It was interesting that Dorie instructs us to just soften the onion rather than caramelize it. She also adds sugar which I’ve never added to biscuits before. Dorie also tells us to use a biscuit cutter just 1″ to 2″ in diameter. I could follow all of Dorie’s suggestions except that one. I believe Dorie uses these as cocktail appetizers but my family expects a little bit bigger biscuits.
We liked the onion added to the biscuits but I might try caramelizing next time to see if that changes the flavor a little and adds color. I think I would eliminate the sugar and increase the salt as they seemed a little sweet to us. The biscuits had a medium rise and split nicely.
Dorie wrote that some of the formed biscuits could be frozen and baked later so I decided to try it out. The frozen ones did take quite a bit longer to bake but I don’t think there was much difference between these and the ones that were baked immediately. This would make them a great convenience.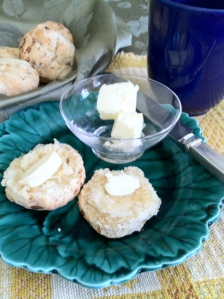
This post is part of French Fridays with Dorie a dedicated group who cook and blog their way through the recipes in Dorie Greenspan’s Around My French Table. Be sure to check out all the wonderful posts here to see how all the others fared with their biscuits.
TWD-BWJ: Rugelach
 Our project for this week is contributing baker Lauren Groveman’s Rugelach. These were definitely not my mother-in-law’s rugelach. When my husband and I were first married I think we had an endless supply of rugelach and/or schnecken. Every week there were pretty tins of prepared treats to take home after Friday night dinner. Mom’s rugelach were crescent shaped pastry with cinnamon sugar and nuts; I don’t believe she ever filled them with lekvar or fruit. Schnecken were rolled jelly-roll style and cut. Because they were always available I never attempted to make them. Sadly, after many years, there came the week when there would never again be treats in the pretty tins. When we broke up mom’s house I packed away the tins.
Once again, Dorie presents us with a recipe that requires another recipe to be made first. I made both the prune and the apricot lekvar. Making the lekvars (pages 498 and 449) was very simple. Basically, the dried fruits are rehydrated by simmering in water until they are soft and then they are pureed in a food processor and mixed with chopped nuts. Both recipes made quite a bit more lekvar than expected but that was fine with me as I knew I could use them to make hamentashen the next week.
With the lekvar made, I prepared the topping(granulated sugar, brown sugar, and cinnamon) and the filling(sugar, cinnamon, and nuts). The recipe also called for 2 cups of diced dried fruits. None of the available fruits at the grocery appealed to me at first, then I saw several large containers of glazed red cherries on the clearance shelf. I love candied cherries; I could eat a whole box of chocolate covered cherries. I thought the cherries would add a little color to the rugelach.
The cream cheese pastry dough was simple and easy to put together. It does need to be chilled in the refrigerator for at least 2 hours. Mine actually got to chill overnight.
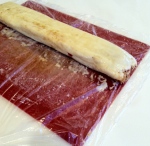
Finally, with all the parts prepared it was time to put them to together to produce the rugelach. This is where the difficulty started for me. The directions say to roll out half the dough to make two 14″ x 5″ rectangles. I did not read the directions correctly the first time but I did catch my mistake before it caused a problem. Once the lekvar, sugar and nut filling, and then a half cup of diced fruit was spread on the 5″ wide strip of dough it was impossible for me to roll it up jelly roll style. Not only would it not make a spiral the ends almost wouldn’t meet. At first I didn’t know what to do; there was no way that the cookies could have been cut from what I had. I finally decided to continue rolling across the other 5″ inch strip spread with lekvar and the nut filling but without the diced fruit. That worked. I ended up with two logs, one prune and one apricot.
The filled logs are then chilled again. The next morning the logs were removed from the refrigerator one at a time and brushed with an egg wash. Then the logs are sliced into 1″ pieces. Then each cookie is pressed into the sugar-cinnamon topping and placed on a parchment paper covered baking sheet. After about 25 minutes in a 375 degree oven the rugelach were golden and perfect.

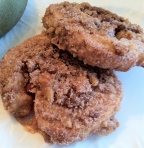 Dorie says these keep for a week in an airtight container. That may be true in Dorie’s house but unfortunately my golden rugelach placed in those pretty tins that were stored away several years ago lasted less than three days. These rugelach were not mom’s rugelah but they were delicious and the path through our kitchen was frequently followed by all members of the family who each had to have just one more. One more, and one more, and one more until they were gone.
 I had planned to make half jellyroll style and half crescent shaped rugelach but since I had to use more dough than Dorie called for I was only able to make the flat, jellyroll style. I will certainly revisit this recipe again and try the other but that will have to wait. There’s hamentashen and a birthday cake to be made this week too.
You can see how all the others did rugelach here.
